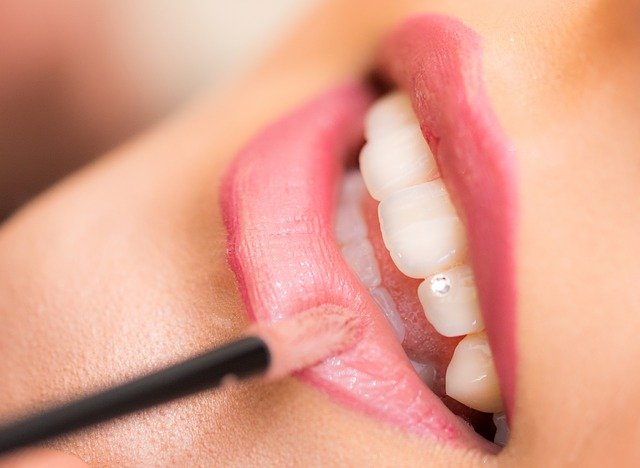
You're about to transform your makeup routine with these five easy contouring methods tailored for beginners. Start by defining your cheekbones and jawline with a matte contour that's slightly darker than your skin. For round faces, highlight strategically down the forehead and under the eyes to enhance cheekbones. If you have a heart-shaped face, balance it by contouring around the temples and jawline. Square faces should soften angles along the hairline and jawline, highlighting key features like cheekbones. Finally, achieve a quick everyday look by blending contour where shadows naturally form, finishing with a fresh, glowing effect. Discover more techniques to refine your look.
Basic Contouring for Oval Faces
When you're just starting with contouring, knowing where to begin can make all the difference, especially if you have an oval face. An oval face is considered versatile and well-balanced, making contouring a bit easier. Start by identifying the areas you want to define, like your cheekbones, jawline, and forehead. Use a matte contour product that's a shade or two darker than your natural skin tone.
Begin with your cheekbones. Suck in your cheeks to find the hollows and apply the contour from the top of your ear towards the corner of your mouth, stopping midway. Blend it in using a brush or sponge, ensuring no harsh lines remain. Next, focus on your jawline. Apply the contour along the edge, blending downwards to create a shadow effect that adds definition.
For your forehead, apply contour along the hairline, blending well to reduce the appearance of a wide forehead. This step helps in balancing your face's proportions. Always remember to blend thoroughly to achieve a natural look. Finish with a setting powder to keep everything in place, ensuring your contouring efforts last throughout the day.
Highlighting Techniques for Round Faces
Moving from contouring techniques for oval faces, let's explore highlighting techniques that work best for round faces. If you've got a round face, your goal is to create an illusion of length to bring balance. Highlighting plays an essential role here, and doing it right can transform your look effortlessly.
- Focus on the Center: Start by applying highlighter down the center of your forehead. This draws the eyes upwards, creating the illusion of a longer face. Extend a thin line down your nose and finish with a pop on your chin to maintain this vertical focus.
- Brighten the Under-Eyes: Dab some highlighter under your eyes in a triangular shape. This not only adds brightness but also lifts your cheekbones, providing structure and dimension often desired with rounder faces.
- Highlight the Cupid's Bow and Brow Bone: Accentuating your cupid's bow gives your lips a fuller appearance. Adding highlighter under your brow bone lifts your eyes, drawing attention upwards and away from the roundness.
These techniques emphasize your features while subtly elongating your face. Remember, blending is key to guarantee a natural look. Practice makes perfect, so don't be afraid to experiment until you find what works for you!
Contouring for Heart-Shaped Faces

Contouring a heart-shaped face often involves balancing the width of the forehead with the narrower chin. To start, apply a contour shade along your temples and the sides of your forehead. This creates an illusion of a smaller forehead, emphasizing the heart shape. Using a matte bronzer or contour stick, blend the product downward to soften the change to your natural complexion.
Next, focus on your cheekbones. Apply contour just below the cheekbones, starting from your ears and moving toward the corners of your mouth. Don't go too far in; stopping halfway creates a natural look. Blend upwards to lift and define your cheekbones, which is essential for enhancing your facial structure.
Finally, contour along your jawline. Lightly apply the contour product along the sides of your jaw, blending towards the chin. This helps reduce the pointed look of a narrow chin, achieving a more balanced appearance.
Remember to blend thoroughly to avoid harsh lines and guarantee a seamless finish. Using a beauty sponge or a fluffy brush works well for this. Add highlight to the center of your forehead, the tops of your cheekbones, and the chin to bring attention to these areas.
Sculpting Tips for Square Faces
Achieving a harmonious look for a square face involves softening its prominent angles. Contouring can help achieve this by adding definition and dimension, giving your facial features a balanced appearance. Start by focusing on areas that naturally catch the light and shadow. Here's how you can enhance your square face shape:
- Forehead and Jawline: Apply contouring powder or cream along the hairline and jawline. This will create a softer, more oval appearance by reducing the width of these areas. Blend well to maintain a natural look.
- Cheekbones: Enhance your cheekbones by applying contour just below the cheekbone, blending towards the ears. This will add depth and draw attention upwards, minimizing the squareness of your face.
- Highlighting: Use a highlighter on the center of your forehead, down the bridge of your nose, and across the tops of your cheekbones. Highlighting these areas will accentuate your features, creating a balanced glow.
Remember to blend thoroughly to avoid any harsh lines, ensuring a seamless shift between your natural skin tone and the contoured areas. With these steps, you'll transform your square face into a beautifully sculpted masterpiece.
Quick Contour for Everyday Look

While sculpting techniques can beautifully enhance a square face, sometimes you need a quick and effortless approach for daily wear. Start with a clean, moisturized face. Use a lightweight foundation to even out your complexion. Grab a contour stick or a matte bronzer that's one or two shades darker than your skin tone.
Apply the contour under your cheekbones, along your jawline, and at the sides of your nose. Focus on areas where shadows naturally fall. Blend using a damp makeup sponge or a soft brush. Don't worry if it looks too harsh; blending is key to a natural look.
Next, add a touch of highlighter to the tops of your cheekbones, the bridge of your nose, and your cupid's bow. This will give your face a subtle glow and enhance your features without a lengthy routine.
Finish with a light dusting of setting powder to keep everything in place throughout the day. If you've got time, a swipe of mascara and a dab of lip balm will complement your look. Remember, the goal is a fresh, subtle contour that enhances your natural beauty without much fuss.
Frequently Asked Questions
What Tools Are Necessary for Contouring Beginners?
You'll need a contour palette with various shades, a blending brush, and a beauty sponge. Consider getting an angled brush for precise application. Don't forget a mirror to check your work from different angles.
How Do I Choose the Right Contour Shade for My Skin Tone?
To choose the right contour shade, identify your undertone. If you're cool-toned, go for taupe or ashy shades. For warm tones, select golden or bronze hues. Test shades on your jawline for the best match.
Can Contouring Techniques Be Used on Mature Skin?
Contouring on mature skin is like painting on a delicate canvas. You can definitely do it! Choose cream products and blend softly. Highlight your natural features, avoid harsh lines, and embrace a subtle, radiant glow for timeless beauty.
How Often Should Contouring Brushes Be Cleaned?
You should clean your contouring brushes at least once a week. This prevents bacteria buildup and guarantees smooth application. Use gentle soap or brush cleaner, rinse thoroughly, and let them dry completely before using them again.
Are There Any Contouring Hacks for a Natural Look?
To achieve a natural look, embrace subtle strokes and blend like a breeze. Use cream products sparingly, focusing on enhancing your features rather than altering them. Remember, a light touch creates a whisper of definition, not a shout.
At a Glance
You've learned the basics for oval faces, mastered highlighting for round shapes, and perfected contouring for heart-shaped features. You've picked up sculpting tips for square faces and discovered a quick routine for everyday looks. Now, you're equipped to enhance your natural beauty with confidence. Practice, experiment, and have fun with these techniques. Remember, the key to great contouring is blending, balancing, and believing in your skills. Embrace your creativity and transform your makeup routine!