Are you looking for a way to enhance your beauty and create the perfect face shape? If so, then look no further than contour. Contouring is an art form that has been used by makeup artists throughout history to accentuate facial features, add dimension, and define bone structure. This article will explore how to sculpt the perfect face shape using contour techniques – from understanding which colors work best with different skin tones to learning what tools are necessary for achieving desired results. With step-by-step guidance, you can learn all the tips and tricks for creating a stunningly beautiful complexion. So keep reading to discover how easy it is to transform your look through contouring!
1. Understanding Different Face Shapes
It’s important to understand different face shapes when sculpting the perfect look. Everyone is unique and has their own individual features, so it’s essential to recognize these variations before beginning any contouring process. Breaking down each face shape allows for a more tailored approach that can bring out your best facial characteristics.
Recognizing the structure of one’s face is key in determining which areas of the face should be highlighted or toned down. For example, if someone has an oval-shaped face, they may want to enhance the cheekbones with a darker shade while highlighting other areas like the forehead and jawline with lighter tones. On the other hand, those with rounder faces will likely want to create shadows on the sides of their cheeks and chin in order to give them a slimmer appearance. It’s all about finding balance and understanding how contour can work for you.
By having a good grasp on what type of facial shape you have, you can use this knowledge to achieve your desired results. You don’t need expensive makeup products either; often times just using blush and bronzer is enough to achieve stunning effects! With patience and practice, anyone can learn how to properly apply contour in order to make their features stand out even more.
2. Analyzing Your Own Face Shape
Now that you’ve familiarized yourself with the different face shapes, it’s time to analyze your own. This step is crucial as it’ll help determine what type of contouring techniques will work best for you.
Start by looking at the shape and proportions of your face in a mirror. Pay attention to any prominent features or angles along your jawline, forehead, and cheeks. Once you have an idea of how wide or narrow certain areas are, use this information to classify your facial structure into one of the basic categories: oval, round, square, diamond-shaped, heart-shaped, and triangular.
Take all these measurements into account when creating your unique contour look. With careful consideration of placement and blending techniques like strobing and highlighting, you can craft a beautifully sculpted canvas that brings out the unique beauty of your face shape!
3. Choosing The Right Contouring Products
Now that you have identified and analyzed your face shape, it’s time to choose the right contouring products. The key is to select formulas and shades that will help you create a look that complements your individual features. To achieve this goal, begin by selecting one of three types of product: cream-based, powder-based or liquid-based makeup.
Creams provide smooth coverage with minimal shine, making them perfect for those who want more natural results. Powders are great for adding definition because they can be easily blended together without looking too heavy. Liquid formulations offer a sheer finish, ideal for creating subtle but noticeable effects. Once you’ve selected your formula type, consider the depth of color next; lighter shades can brighten up certain areas while darker hues give a toned-down effect.
When applying any kind of contour makeup, start off light and gradually add more layers until you reach the desired result—it’s much easier to build upon than take away! Remember to use an angled brush when blending so as not to leave harsh lines on your skin.
4. Applying The Contour To Enhance Your Features
Applying the contour correctly is essential for creating the perfect face shape. To begin, it’s important to choose a product that suits your skin type and tone. This way, you’ll be able to blend with ease and create a natural-looking result.
Once you’ve found the right product for you, it’s time to get started! First, use an angled brush or sponge to apply the chosen shade of contouring powder on areas such as your temples, hairline and jawline. You can also add definitions by applying some along your cheekbones in an ‘X’ pattern. Make sure to only apply where needed – too much will make your features look harsh and unnatural.
Finally, using a bigger brush or beauty blender, blend out any lines created from applying the product so everything looks seamless. Remember – blending is key! Keep going until all edges are blended into one another and you’re happy with how it looks – this may take some practice but once you’ve got it down pat, you’ll be able to rock a sculpted face shape like a pro!
5. Blending The Contour For Natural-Looking Results
Now that you have mastered the art of applying contour to your face, it’s time to move on to the final step—blending. Blending is crucial for achieving a natural-looking result and making sure all the work you put in isn’t wasted!
The technique for blending contour makeup is fairly straightforward but can take some practice. Start by using circular motions with a damp beauty sponge or brush on areas where your contour lines are too harsh or noticeable. This will help blend out any sharp lines and integrate them into your foundation base. You should also use this same technique around the perimeter of your face to make sure everything looks blended together seamlessly.
Finally, finish off with a light dusting of setting powder that overtops the area to lock in your look and give yourself an airbrushed effect. With these steps, you’ll be able to craft beautiful facial features effortlessly while still keeping them looking natural!
6. Tips For Contouring To Achieve A Different Face Shape
To get the perfect face shape it’s important to understand how contouring works. While blending is essential for a natural finish, sometimes you want to create a different look than your own facial structure. That’s where these tips come in.
Contouring can have drastic effects when done correctly. To achieve an oval-shaped face, for example, use darker shades of makeup on the sides of your forehead and temples, as well as along the jawline and chin. This will help define those areas and make them appear more prominent. To go from oval to heart-shaped, add definition to the cheekbones by sweeping bronzer upward beneath them – this gives the illusion of higher cheeks. You’ll also need a slightly lighter shade of foundation or concealer around the area near your eyes and nose so that they stand out against the darker tones used elsewhere on your face.
If you’re looking for something completely different then try using contrasting colors like pink and purple together with subtlety – just enough that it catches people’s attention without being too overbearing. Remember, practice makes perfect! When first starting out don’t be afraid to experiment until you find what works best for you; take pictures throughout each step so you can see what looks good and what doesn’t work so well. With some patience and dedication soon you’ll be sculpting beautiful shapes with ease!
7. Aftercare And Maintenance Of Your Contour
Once you’ve achieved the perfect face shape through contouring, it’s important to take care of your new look. Maintenance and aftercare are key for keeping that sculpted appearance. Here are some tips on how to maintain your newly-contoured face.
First off, make sure to use a moisturizer with SPF every day as this will help keep your skin healthy and protect against sun damage. It’s also important to exfoliate regularly in order to remove any dead skin cells or makeup residue from the surface of your face, which can clog pores and cause breakouts. Lastly, don’t forget about regular hydration; drinking plenty of water helps keep skin looking plump and glowing.
It’s equally crucial to cleanse your brushes and sponges properly between uses in order to avoid transferring bacteria or oils onto the skin. Additionally, be mindful when selecting products for application; opt for those specifically formulated for facial use rather than general body cosmetics, since these tend to contain harsher ingredients that could irritate delicate facial skin. With just these few simple steps, you can ensure that you’ll always have an enviable complexion!
Conclusion
Contouring can be a fun and easy way to enhance your natural beauty. With the right techniques, the contour can help you sculpt a perfect face shape that suits your individual features. By understanding different face shapes, analyzing your own face shape, choosing the right products for application, blending the contour properly, and following tips for achieving a desired look, you will be able to create stunning results every time. Aftercare is important as well in order to maintain good skin health while wearing makeup.
Contouring may take some practice but it is an enjoyable experience with great rewards! So don’t forget to add this technique into your daily routine and enjoy the confidence boost of having perfectly sculpted cheeks and jawlines!
3 Recommended Makeup Products For Contouring
e.l.f. Cosmetics Contouring Blush & Bronzing Powder
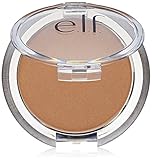
A two-in-one compact with a rosy blush and a golden bronzer to help you create the perfect contoured look in minutes. The lightweight, buildable formula is infused with Vitamin E and tames shine, giving you a natural-looking glow. The perfect finishing touch to any makeup look!
NYX Professional Makeup Wonder Stick Highlight & Contour
An easy-to-blend dual-ended stick with a creamy formula that provides buildable coverage to help you sculpt and define your features. Perfect for on-the-go use, this highlight and contour stick is available in light, medium and deep shades.
Maybelline New York Facestudio Master Contour V-Shape Duo Stick

A double-ended stick with one side for highlighting and one side for shading that helps you easily define your facial shape for a perfectly contoured look. It features a creamy, blendable formula that melts into skin for seamless blending and natural-looking results. The matte finish resists fading and smudging, so you can look your best all day long!