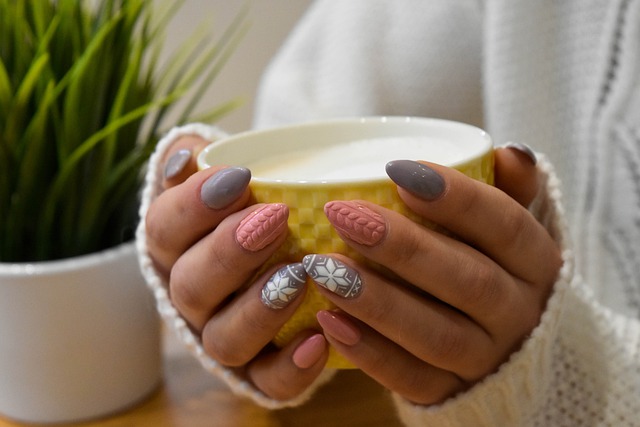
You're ready to remove that gel polish at home, but you're not sure where to start. You've probably heard that it's a bit of a process, and you're right – it does require some care and patience. To begin, you'll want to prepare your nails properly to guarantee the gel comes off smoothly. But what's the best way to do this, and what tools do you need? Let's break down the essentials: preparing your nails, choosing the right remover, and applying it correctly. But first, have you considered the potential damage to your nails if you don't do it just right?
Preparing Nails for Gel Removal
Before starting the gel removal process, you need to prepare your nails by washing your hands and removing any oils or lotions that may interfere with the removal process. You'll want to make certain your nails are completely clean and dry. If you've been using nail strengtheners or have applied cuticle oil recently, now's the time to wipe it off. This step guarantees the remover can penetrate the gel effectively.
Next, gently push back your cuticles to prevent the remover from getting on your skin. You don't want any harsh chemicals irritating your skin. Now, take a lint-free wipe or cotton ball and gently buff the surface of your nail to roughen it up. This helps the remover penetrate the gel more easily. Don't overdo it – just a light buffing will do. By following these simple steps, you'll be able to prepare your nails for a successful gel removal process. Your goal is to create an ideal surface for the remover to work its magic.
Choosing the Right Remover Tools
Select a gel remover that suits your nail type and the type of gel you're trying to remove, as different removers work better with different gels and nail conditions. You'll want to weigh the ingredients and the remover's strength when making your selection. Acetone-based removers are the most common type, but they can be harsh on your nails and surrounding skin. If you have weak or brittle nails, you may want to opt for an acetone-free remover or a gentler alternative.
When choosing a remover, you'll also want to ponder the application method. Some removers come in a bottle with a brush for easy application, while others are wraps or stickers that you apply directly to your nails. Whichever type you choose, make sure you have some cotton balls or pads on hand to gently scrub away the gel. You'll also need a cuticle pusher or orange stick to help lift the gel off your nails. With the right remover and tools, you'll be well on your way to safely and effectively removing your gel at home. Additionally, it’s important to consider the ingredients in the remover and choose one that is gentle on your nails and cuticles. Some removers also contain conditioning agents to help nourish your nails as they are being cleaned. In addition to removing gel, many removers can also be used to remove makeup stains. Consider purchasing a remover that has multiple uses to get the most out of your purchase.
Soaking Nails for Easy Removal
To loosen the gel and make it easier to remove, you'll need to soak your nails in the remover for a period of time, which can range from a few minutes to up to 30 minutes, depending on the type of remover and gel you're using. You'll know it's working when you start to see the gel lifting off the nail. Make sure to check on your nails periodically to avoid over-soaking, which can dry out your nails and surrounding skin.
To soak your nails effectively, pour some remover into a small bowl and let your fingers soak in it. You can also use a small cotton ball or swab soaked with remover and place it directly on your nail, making sure to cover the entire gel area. Keep an eye on the time and adjust the soaking period as needed. If you're using a strong remover, you may need to soak your nails for a shorter time to avoid irritation.
Wrapping Nails for Removal Success
Wrap a piece of aluminum foil or a cotton pad around each finger, securing the remover-soaked cotton ball or swab in place, to help the remover penetrate the gel more effectively. By doing this, you're creating a mini "oven" that traps the remover and allows it to work its magic on the gel. Make sure to wrap the foil or pad snugly around your finger, but not too tight, as you want to avoid cutting off circulation.
Leave the wrapped cotton balls or swabs on for about 15-20 minutes to allow the remover to break down the gel. You might start to feel the gel lifting off the nail or see it begin to crack. This is a good sign! After the time is up, carefully remove the foil or pad and gently scrape off the gel with a cuticle pusher or an orange stick. Be gentle, as you don't want to scratch your nail. If some gel remains, you can repeat the process.
Using Gel Remover Pads Correctly
Instead of using the foil or cotton pad method, you can try gel remover pads, which are specifically designed to make the removal process easier and less messy. To use gel remover pads correctly, start by prepping your nails. Make sure they're free of oils and lotions, as these can interfere with the remover's effectiveness.
Next, place a gel remover pad on each nail, pressing it firmly onto the surface. You'll know the pad is working when you see the gel start to lift and separate from your nail. Let the pad sit for the recommended amount of time, usually 10-15 minutes. You may need to gently scrape off the gel with a cuticle pusher or wooden stick, but be careful not to scrape too hard, as this can damage your nails.
If some gel remains after the first application, you can repeat the process until all the gel is removed. When you're done, wash your hands thoroughly with soap and water to remove any remaining remover residue. By following these steps, you can successfully remove gel using gel remover pads.
Acetone Vs Non-Acetone Remover
Choosing between acetone and non-acetone remover is a pivotal decision when it comes to safely and effectively removing gel from your nails. You need to ponder your nail type, the condition of your nails, and the type of gel you're using. Acetone removers are the most common choice for gel removal, as they quickly break down the gel's adhesive properties. However, acetone can be harsh on your nails, causing dryness, brittleness, and weakening.
On the other hand, non-acetone removers are gentler on your nails and can be a better option if you have weak or brittle nails. These removers take longer to work, but they're less likely to cause damage. When deciding between acetone and non-acetone, you should also ponder the type of gel you're using. Some gels are designed to be removed with acetone, while others may require a non-acetone remover. You'll want to read the instructions carefully to choose the right remover for your specific gel type. Ultimately, it's essential to choose a remover that balances effectiveness with nail care.
Scraping Off Gel Safely
When scraping off gel, you'll want to be gentle yet firm to avoid damaging the nail surface. You'll need a cuticle pusher or a wooden stick specifically designed for this purpose. Start by gently prying the edge of the gel polish, working your way around the nail. Be careful not to scrape too hard, as this can cause the nail to lift or crack.
As you scrape, you'll begin to see the gel polish lifting off the nail. Continue to gently pry and scrape, working your way around the nail until all of the gel is removed. If some areas are stubborn, you can use a little more force, but be cautious not to press too hard. It's also essential to avoid scraping back and forth, as this can cause damage to the nail surface. By being gentle and patient, you can safely scrape off the gel polish without causing harm to your nails.
Removing Gel Without Acetone
While scraping off gel safely is one method, you can also use alternative techniques to break down the gel polish without relying on acetone. You can try using a gel remover that doesn't contain acetone, which is a gentler option for your nails. Apply the remover to a cotton pad and place it on your nail, letting it sit for a few minutes before gently scraping off the gel.
Another option is to use a mixture of equal parts water and white vinegar, which can help loosen the gel polish. Soak a cotton pad in the solution and place it on your nail, letting it sit for a few minutes before scraping off the gel. You can also try using a hair dryer to heat up the gel polish, which can help loosen it and make it easier to remove. Be careful not to heat your nail too much, as this can cause damage.
Caring for Nails After Removal
After removing the gel polish, gently moisturize your nails and surrounding skin to help hydrate and soothe any dryness or irritation caused by the removal process. You can use a rich cuticle oil or a nourishing hand cream to lock in moisture. Massage the oil or cream into your nails and cuticles to stimulate blood flow and promote healthy growth.
Next, use a nail file to gently shape and smooth out your nails. Be careful not to file too aggressively, as this can cause further damage or breakage. If you notice any ridges or imperfections, use a buffer to gently smooth them out.
To finish, apply a strengthening base coat to help fortify your nails and prevent future breakage. Look for a base coat containing ingredients like keratin, calcium, or vitamins to provide an extra dose of nourishment. By taking these simple steps, you'll be able to help your nails recover from the gel removal process and keep them healthy and strong.
Common Gel Removal Mistakes
To avoid damaging your nails, it is vital to be aware of the common mistakes people make when removing gel polish at home. You're likely to make mistakes if you're new to gel removal, but being aware of them will help you take necessary precautions. One common mistake is scraping or peeling off the gel polish. This can cause lifting or separation of the nail from the nail bed, leading to pain and sensitivity.
You should also avoid using harsh chemicals or excessive force when removing gel polish. Using acetone that's too strong or leaving it on for too long can dry out your nails and surrounding skin. Similarly, using force to pry off the gel polish can cause breaks or cracks in your nails.
To minimize damage, key is to follow a gentle removal process. This includes using a suitable acetone, wrapping your nails properly, and checking on the gel polish frequently to avoid over-processing. By being mindful of these common mistakes, you'll be able to remove your gel polish at home safely and effectively.
At a Glance
You've successfully removed your gel polish at home. Now, take good care of your nails by applying rich cuticle oil and nourishing hand cream. This will lock in moisture and promote healthy nail growth. Remember to avoid common mistakes, such as using the wrong remover or scraping too hard. With practice, you'll become a pro at removing gel polish at home and keeping your nails healthy and beautiful. Keep up the good work!