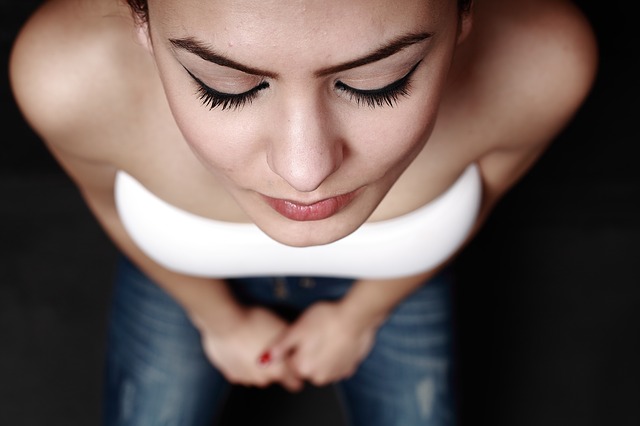
To banish dark circles, choose a concealer just one to two shades lighter than your skin tone, focusing on complementing undertones. Prep your under-eye area with a hydrating eye cream, avoiding too much moisture. Start with a corrector to neutralize any purple or blue tones, and then apply concealer in a triangle shape under your eyes for light reflection. Pat gently with a brush or sponge for seamless blending. Set with a light dusting of translucent powder to lock it in place and avoid creasing. A little midday touch-up can keep your look refreshed and lasting all day. Discover more detailed techniques and tips just ahead.
Choose the Right Shade
Finding the perfect concealer shade can be a revelation in your makeup routine. It not only brightens your under-eye area but also seamlessly blends with your skin for a natural look. When choosing your concealer, focus on finding the right undertone. If you have cool undertones, opt for concealers with pink or red hues. For warm undertones, look for products with yellow or golden shades. Neutral undertones work well with peach or beige concealers.
Match the concealer to your skin tone by testing it on your jawline or inner wrist. The shade should disappear into your skin without leaving a noticeable line. Remember, the goal is to cover dark circles, not create a new color patch. When selecting a concealer for under-eye use, aim for one to two shades lighter than your natural skin tone. This will counteract the darkness while adding brightness to your eyes.
Don't rely solely on artificial lighting when testing shades. Check the concealer in natural light to verify the best match. By taking the time to select the right shade, you'll enhance your makeup look and achieve a flawless finish.
Prep Your Under-Eye Area
Preparing your under-eye area is essential for achieving a smooth and long-lasting concealer application. Start by ensuring your skin is clean and free of any makeup residue. Use a gentle cleanser or makeup remover specifically designed for the sensitive eye area. Once your skin is clean, the next vital step is to hydrate. Apply an eye cream or gel that targets dark circles and puffiness. This will not only moisturize the delicate skin but also create a smooth canvas for your concealer.
After hydrating, allow the product to absorb fully into the skin. This might take a few minutes, so be patient. Avoid applying too much product, as excess moisture can cause your concealer to slip or crease. If you have particularly dry under-eyes, consider using a lightweight facial oil before the eye cream for an extra boost of hydration.
Finally, think about priming. While it's not mandatory, a primer designed for the under-eye area can help your concealer adhere better and last longer. Choose a formula that's lightweight and absorbs quickly to avoid any cakey buildup. With these steps, you're setting the stage for flawless concealer application!
Use a Corrector First

Before diving into concealer application, consider using a corrector to tackle dark circles effectively. Correctors are designed to neutralize the purple or blue tones in dark circles, creating a smooth base for your concealer. Choose a corrector shade that complements your skin's undertones. For many, peach or orange correctors work best against dark circles, as they counteract the bluish hues common in under-eye shadows.
Start by applying a small amount of corrector directly to the dark areas using either your fingertips or a makeup brush. Be gentle to avoid tugging on the sensitive skin around your eyes. Dab the product onto the skin, starting at the inner corner where darkness is usually most pronounced, and blend outwards. The goal is to achieve an even layer that visibly diminishes discoloration.
The corrector should look natural and not cakey. If it feels too thick, try using less product or switching to a lighter formula. After applying the corrector, give it a moment to set. This step guarantees that when you follow with concealer, you'll achieve a bright, awake look that lasts throughout the day.
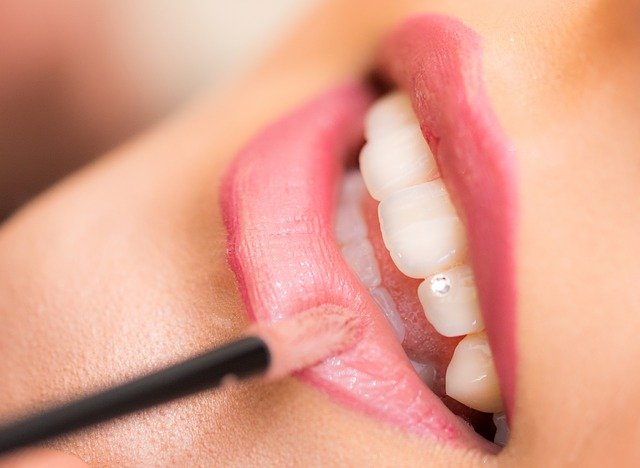
Apply in a Triangle Shape
With your corrector set, it's time to enhance your look by applying concealer in a triangle shape under your eyes. This technique not only conceals dark circles but also brightens your entire face, giving you a refreshed, youthful appearance. Start by choosing a concealer that's one to two shades lighter than your skin tone, guaranteeing it blends well and offers adequate coverage.
To begin, draw an upside-down triangle under each eye. The base of the triangle runs along your lower lash line, while the point extends towards your cheek. This shape maximizes the light-reflecting properties of your concealer, lifting and illuminating your under-eye area. By extending the concealer down towards your cheeks, you're also creating a more natural shift, preventing any harsh lines.
Using your ring finger or a concealer brush, gently pat the product into your skin. This method guarantees you maintain coverage without wiping away the product. Remember, less is more. Start with a small amount of concealer and build up coverage as needed. This approach allows for a more natural finish, avoiding any cakey or heavy appearance. Once applied, your under-eye area will look brighter and more awake.
Blend With Precision

Achieving a flawless finish with your concealer requires blending with precision. To start, make certain you have a good blending tool on hand. A damp makeup sponge or a soft brush works wonders. The key is to use gentle, tapping motions rather than dragging the product across your skin. Tapping helps the concealer meld seamlessly with your skin and reduces the risk of disturbing the application underneath.
Begin at the inner corner of your eye, where darkness is often most pronounced, and work outward towards your temples. This guarantees even coverage and a natural shift into your foundation. Pay close attention to the edges of the concealer so it blends seamlessly with the rest of your makeup, creating a smooth, unified look.
If you're working with a liquid concealer, take your time to blend to avoid lines or creases. With cream formulas, a bit more warmth from your fingers might help for a smoother finish. Be patient, as rushing can lead to patchiness. Remember, less is more. Build coverage gradually, blending each layer completely before adding more. With these techniques, you'll achieve that airbrushed look every time.
Set With Translucent Powder
Once you've blended your concealer to perfection, it's crucial to set it with translucent powder to lock in the coverage and prevent creasing. Choose a finely milled, lightweight powder that matches your skin tone or is slightly lighter. This guarantees a smooth, natural finish without adding extra color. Using a small, fluffy brush, gently tap a small amount of powder onto the brush and tap off any excess. This prevents over-application, which can lead to a cakey appearance.
Apply the powder by lightly pressing it onto the concealed area, focusing on the under-eye region where dark circles are most prominent. Avoid using a sweeping motion, as it can disturb the concealer's placement. Instead, use a gentle dabbing motion to guarantee the concealer stays put. This technique helps in absorbing excess oils and moisture throughout the day, keeping your makeup looking fresh.
For added brightness, try a powder with light-reflecting particles. However, be cautious not to overdo it, as too much shimmer can draw attention to fine lines. By setting your concealer this way, you maintain a flawless, natural look that lasts all day.
Avoid Creasing Techniques

To prevent your concealer from creasing, start with a well-moisturized under-eye area. Hydration is key, so use an eye cream to prep your skin. This creates a smooth base, allowing your concealer to blend seamlessly. After moisturizing, let the cream absorb for a few minutes before applying makeup.
Choose a lightweight, creamy concealer that doesn't dry too quickly. Dab it gently under your eyes using a brush or your fingertip. Avoid dragging, which can cause creasing. Apply the concealer in thin layers, building coverage as needed. Less is more; too much product tends to settle into fine lines.
Next, lightly tap the concealer with your ring finger or a damp makeup sponge to guarantee it's well-blended. This technique helps melt the product into your skin, minimizing the chance of creasing. Be gentle, as the under-eye area is delicate.
Finally, lock in your concealer with a small amount of translucent powder. Use a fluffy brush to dust it lightly over your concealer. This step sets the product without making it cakey. Remember, a light touch is essential to avoid emphasizing texture. With these techniques, your concealer will stay crease-free and flawless.
Refresh Throughout the Day
While a perfectly applied concealer can start your day flawlessly, maintaining that fresh look requires a little upkeep. As the day progresses, natural oils and environmental factors might cause your concealer to fade or settle into fine lines. To keep those dark circles at bay, a quick midday refresh can work wonders.
First, use blotting papers to gently remove excess oil from the under-eye area without disturbing the makeup. This step is vital for a smooth reapplication. Next, take a small amount of your concealer and lightly dab it using your ring finger or a clean makeup sponge. The warmth from your finger helps blend the product seamlessly. Be careful not to overapply—less is more for a natural finish.
For added brightness, you can apply a touch of illuminating powder or a setting spray specifically designed for under-eye areas. This not only refreshes your look but also locks the concealer in place for the rest of the day. Remember, the key is to refresh, not redo your makeup. By taking a few minutes to touch up, you'll look vibrant and well-rested, no matter how long your day lasts.
Frequently Asked Questions
Can Concealer Help With Puffiness Under the Eyes?
Yes, you can use concealer to address puffiness under the eyes. Choose a lightweight formula with a slightly peachy tone. It won't eliminate puffiness but can help brighten and create an illusion of smoother, less puffy skin.
How Do I Prevent Concealer From Looking Cakey?
To prevent cakey concealer, hydrate your skin first. Use a lightweight moisturizer and primer. Apply concealer sparingly, blending well with a damp sponge. Set it with a translucent powder for a smooth, natural finish.
Is It Necessary to Use a Moisturizer Before Applying Concealer?
Did you know 80% of makeup professionals recommend moisturizing first? It smooths your skin's surface, preventing creases and enhancing concealer's longevity. Don't skip this step if you want a flawless, natural look that lasts all day.
What Type of Concealer Is Best for Sensitive Skin?
When you've got sensitive skin, choose a hypoallergenic, fragrance-free concealer. Look for products with soothing ingredients like aloe vera or chamomile. Always patch test first to verify it won't irritate your skin. Prioritize gentle formulas for comfort.
Can I Use Concealer to Cover Dark Spots on Other Parts of the Face?
Absolutely, think of concealer as your magic wand. It can hide dark spots anywhere on your face. Just dab it gently on the areas needed, blending seamlessly with your natural skin for a flawless finish.
At a Glance
You've got all the tools to tackle those pesky dark circles with confidence. Isn't it amazing how the right concealer shade and a little prep can transform your look? By using a corrector and applying in a triangle shape, you guarantee even coverage. Don't forget to blend precisely and set with translucent powder to keep everything in place. With these tips, you'll avoid creasing and stay refreshed all day. Ready to face the world with bright eyes?