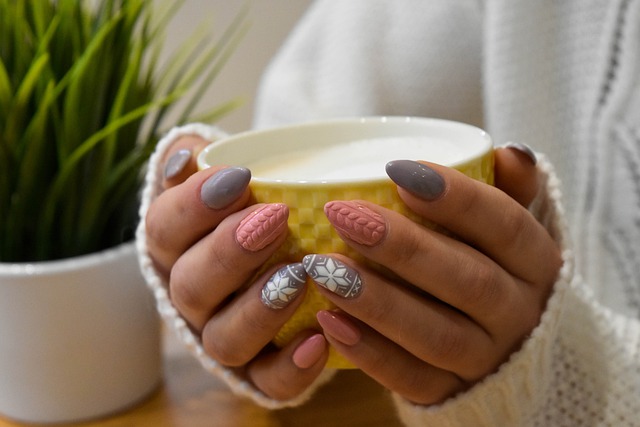
To create an easy DIY gel manicure at home, start by gathering essentials like gel base and top coats, polish, a UV lamp, nail files, and isopropyl alcohol. Prep your nails by removing old polish, washing your hands, and pushing back cuticles. Shape and smooth nails with a file, then apply a thin base coat, curing it under the lamp. Layer on gel polish, curing between coats, and finish with a top coat for shine. After curing, cleanse with alcohol for a glossy finish and moisturize with cuticle oil. Stick around for more tips on perfecting your home gel manicure.
Gather Your Supplies
To get started with your DIY gel manicure, you'll need to gather your essential supplies. First, make certain you have a gel base coat and a gel top coat. These are vital for creating long-lasting, shiny nails. You'll also need a selection of gel nail polish colors to match your mood or style. A high-quality LED or UV lamp is necessary for curing the gel, so double-check that yours is in good working order.
Next, verify you've got nail files and a buffer. You'll use these to shape your nails and create a smooth surface for the polish to adhere to. A cuticle pusher will help you gently nudge back your cuticles, giving your nails a clean, professional look. Don't forget lint-free wipes and isopropyl alcohol to remove any dust or oils from your nails before applying the polish.
Finally, have a few cotton pads and acetone on hand for removing any mistakes during the application process. With everything ready, you're well-equipped to start your gel manicure journey. Stay organized, and make certain all your supplies are within reach.
Prepare Your Nails
Before diving into the fun part of applying gel polish, make sure your nails are perfectly prepped. Start by removing any old nail polish using an acetone-based remover. This guarantees a clean slate for your gel manicure. Next, wash your hands thoroughly with soap and water to get rid of any lingering oils or dirt. Dry your hands completely, as moisture can interfere with how the gel polish adheres to your nails.
Push back your cuticles gently using a cuticle pusher. This step is vital because cuticles can prevent the gel polish from sticking properly, leading to peeling or chipping. Be careful not to push too hard to avoid damaging your nail beds.
Once your cuticles are taken care of, use a lint-free wipe soaked in alcohol or a nail cleanser to wipe each nail. This removes any remaining oils and gives your nails a matte finish, which helps the gel polish stick better. If your nails tend to be oily, you might want to repeat this step to make sure they're completely oil-free. Preparing your nails properly is key to a long-lasting, flawless gel manicure.
Shape and Buff

Now that your nails are prepped, it's time to shape and buff them to perfection. First, select a nail file with a grit between 180-240, which is ideal for natural nails. Hold the file at a slight angle and start filing from the outer edge toward the center, using smooth, gentle strokes. Avoid sawing back and forth, as this can weaken your nails. Decide on the shape you prefer—round, square, or almond—and file evenly to achieve a uniform look.
Once your nails are shaped, it's time to buff them. Choose a buffer with multiple surfaces, each with different levels of grit. Begin with the coarsest side to gently smooth out any ridges. Use light, circular motions and guarantee you cover the entire nail surface. Next, switch to the finer side to polish the nails, giving them a natural sheen.
Buffing enhances the nails' appearance and creates a smooth base for the gel polish. Be cautious not to over-buff, as this can thin your nails and make them fragile. With your nails now shaped and buffed, you're ready to move on to the next step in your gel manicure.
Apply Base Coat
Applying the base coat is an essential step in your DIY gel manicure process. It acts as the foundation for your gel polish, guaranteeing better adhesion and longer-lasting wear. Begin by selecting a high-quality gel base coat, as this can greatly impact the final result. Start with clean, dry nails, free from any oils or residue. You can wipe them with a lint-free pad soaked in alcohol to make sure they're thoroughly prepped.
When applying the base coat, use thin, even strokes. Dip the brush in the bottle, removing any excess product. Start from the base of your nail near the cuticle, and gently sweep the brush toward the tip. Be careful not to flood the cuticle or sides with product, as this can lead to lifting later. Cover every part of the nail, including the edges, to seal it completely.
Take your time and pay attention to detail. A smooth, thin layer sets the stage for a flawless manicure. Remember, the base coat is essential for protecting your natural nails from potential staining and damage, so don't skip this important step. Once applied, you're ready to move to the next phase of your gel manicure.
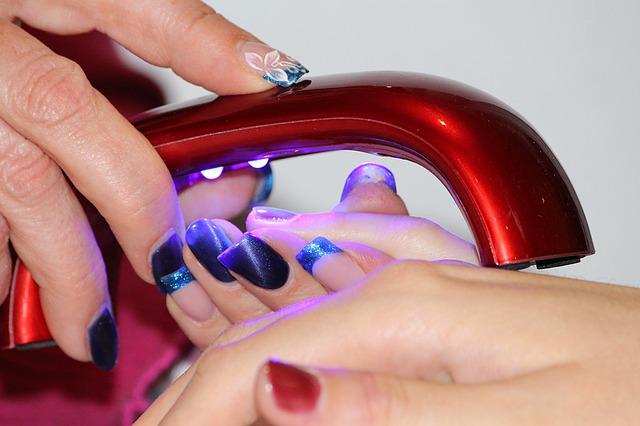
Cure Under UV Lamp

With your base coat expertly applied, it's time to cure your nails under a UV lamp. Begin by setting up your UV lamp on a stable surface, ensuring it's plugged in and ready to go. Place your first hand inside the lamp, keeping your fingers splayed so each nail gets equal exposure. Most UV lamps require about two minutes to effectively cure the base coat, so set a timer if needed to avoid over-curing, which can cause the nails to weaken or discolor.
While curing, keep your hand steady and avoid bumping the lamp, as any movement can lead to an uneven cure. Once the timer goes off, carefully remove your hand and repeat the process with your other hand. Don't rush this step; proper curing is essential for a durable gel manicure.
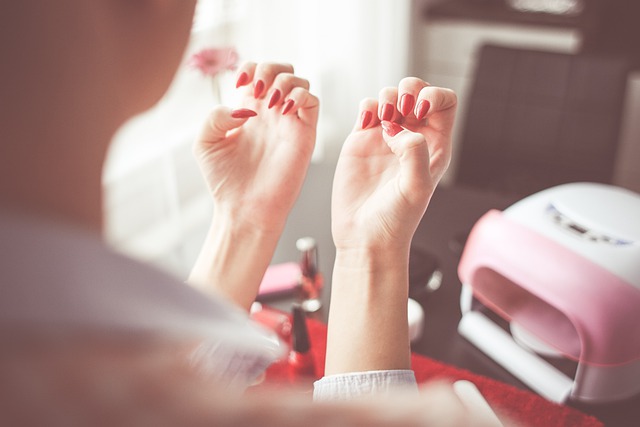
Add Gel Polish
Ready your favorite gel polish and prepare for the fun part of your DIY manicure. This is where your creativity truly shines! Start by shaking the bottle gently to guarantee the polish is well-mixed. Open the bottle and wipe the brush against the rim to remove excess polish. You want just enough on the brush to cover your nail thinly without pooling at the sides.
Apply the polish starting from the center of your nail, just above the cuticle. Slowly guide the brush toward the tip, using even strokes. Next, move to the sides, guaranteeing even coverage without touching your skin. If you do, use an orange stick dipped in acetone to clean up the edges before curing.
Once you've finished one hand, check for streaks or bubbles. If present, gently smooth them out with the brush. Remember, thin layers are your best friend; they help the polish cure evenly and prevent the dreaded peel-off later. If you desire a deeper color, a second coat is a great idea. Follow the same steps for each nail. With practice, you'll perfect your technique, making each manicure better than the last.
Seal With Top Coat

Once you've perfected the color, it's time to lock in your masterpiece with a top coat. A top coat is vital for sealing your gel polish, adding shine, and guaranteeing your manicure lasts. Start by selecting a high-quality gel top coat for best results. Before applying, make certain your colored gel polish is fully cured under the UV or LED lamp. Avoid skipping this step, as a sticky surface can lead to smudging.
Apply the top coat using smooth, even strokes. Start at the center of your nail, then move to the sides, guaranteeing full coverage without flooding your cuticles. It's important to seal the free edge of your nail by brushing the top coat along the edge. This helps prevent chipping and peeling. Once applied, cure the top coat under the lamp for the recommended time specified by the product instructions. This guarantees the top coat hardens properly and provides a glossy finish.
After curing, your nails might have a tacky layer. Don't worry; this is normal. Simply use a lint-free wipe soaked in isopropyl alcohol to gently remove it. This step reveals a shiny, durable finish. Now, admire your long-lasting gel manicure!
Clean and Moisturize
After completing your gel manicure, someone might overlook the importance of cleaning and moisturizing, but it's an essential step. Once your top coat is cured, a sticky residue may remain on your nails. This tacky layer is normal, but it's important to remove it to reveal the shine underneath. Use a lint-free wipe soaked in isopropyl alcohol to gently wipe each nail. This will guarantee your nails have that perfect, glossy finish you've worked so hard for.
Next, let's talk about moisturizing. Gel manicures can be drying, so you'll want to restore hydration to your cuticles and skin. Massage a nourishing cuticle oil into the base of each nail. This not only moisturizes but also improves circulation, promoting healthy nail growth. Follow up with a rich hand cream to keep your skin soft and smooth. Focus on areas that tend to get dry, like your knuckles and the backs of your hands.
Frequently Asked Questions
How Long Should a Gel Manicure Typically Last?
A gel manicure should typically last about two to three weeks. You'll notice chipping or lifting when it's time for a change. Maintain your nails by avoiding harsh chemicals and wearing gloves during chores to extend longevity.
Can Gel Polish Be Removed Without Damaging My Nails?
You can remove gel polish without damaging your nails; 75% of people experience no damage when using acetone properly. Soak your nails in acetone, wrap them in foil, and gently scrape off the polish.
Are LED Lamps Safer Than UV Lamps for Curing Gel Polish?
Yes, LED lamps are generally safer because they emit less UV radiation and cure gel polish faster. You'll reduce exposure time and potential skin damage. Always use sunscreen on your hands for added protection during curing.
What Should I Do if My Gel Polish Chips Prematurely?
If your gel polish chips prematurely, start by gently buffing the chipped area. Apply a thin layer of base coat, cure it, and then reapply color and top coat. Seal the edges, and cure again.
How Often Should I Give My Nails a Break From Gel Manicures?
You should give your nails a break from gel manicures every 8-12 weeks to maintain their health. During this time, apply nourishing oils and avoid harsh chemicals to help them recover and stay strong.
At a Glance
You've nailed it! With your newfound skills, you can now flaunt salon-quality gel manicures right from the comfort of your home. Remember, practice makes perfect; each stroke of polish adds to your expertise. So, gather your supplies, follow the steps, and let your creativity shine. Your hands are the canvas, and with a bit of patience, they'll be a masterpiece. Keep them clean and moisturized, and your nails will thank you for the pampering.