Nail polish is a great way to express your personality and style, but it can be tricky getting the perfect manicure. Whether you are rocking bold colors or classic neutrals, having perfectly polished nails requires some finesse. Fortunately, there are key tips and tricks to help make sure that every coat of nail polish goes on flawlessly!
In this article, we will explore the essential do’s and don’ts of applying nail polish for a beautifully finished look. We will go over the basics such as ensuring your nails are clean before polishing and how to apply multiple coats without streaks. You’ll also learn must-know information about color selection, topcoats and stamping designs.
At the end of this guide, you’ll have all the knowledge needed to achieve a salon-quality mani right at home! So grab your favorite shades and let’s get started crafting those stunningly polished nails!
Nail Preparation: The Basics
Before you can apply the perfect coat of nail polish, there’s one crucial step: nail preparation. This is a vital part of any manicure that sets the stage for success and ensures your final look will be flawless. So what are the do’s and don’ts when it comes to prepping nails?
First things first, remove all traces of old polish before beginning. You’ll want to use an acetone-based remover since it does a thorough job without damaging your nails. If you’re sporting natural nails, you should also make sure they’re dry and free from dirt or oils – these can interfere with paint adhesion. Once you’ve cleaned up your canvas, trim and shape your nails as desired using clippers and/or an emery board. It may not seem like much effort but taking time on this step helps ensure that each nail looks polished and refined after painting.
Finally, consider adding some extra protection with a base coat once everything else is done. Not only does this help strengthen weak nails, but it also provides a barrier between skin color pigment (which can affect how colors appear) and your chosen hue. Whatever basecoat you choose, make sure to let it completely dry before moving on to the main event: polishing! Following these simple steps will have you looking perfectly polished in no time at all.
Choosing The Right Nail Polish
Choosing the right nail polish for your look is essential to achieving a perfectly polished look. Before you begin, it’s important to have an idea of what you’re looking for: are you going for something more subtle or vibrant? No matter which style you choose, there are certain guidelines that can help ensure your manicure looks its best.
First and foremost, make sure the color complements your skin tone. If you have fair skin, try softer shades like pinks and beiges; if you have darker skin, bolder colors like reds and blues will work well. Also, consider whether you want a glossy finish or something more matte. Glossy finishes tend to last longer but may chip easier than mattes, so pick depending on how often you plan on re-applying it.
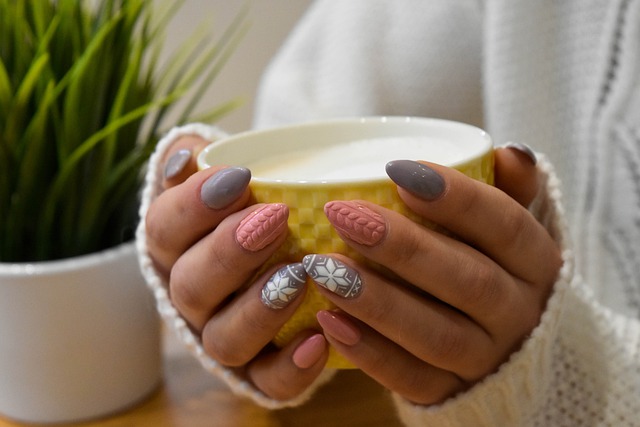
Take into account any special features such as glitter accents or textured designs – these can add extra dimension and flair to your nails! When selecting these unique touches, keep in mind that they should match the overall look of your manicure rather than overpowering it. With careful consideration of all these factors when choosing nail polish, you’ll be one step closer to creating a perfectly polished result!
Tips For Applying Nail Polish
Once you have selected the right nail polish for your look, it’s time to apply it. Applying nail polish can seem daunting at first but with a few tips and tricks, you’ll be on your way to perfectly polished nails in no time!
First things first: make sure your hands are clean and free of any lotions or oils. These will prevent the polish from adhering properly and could lead to cracking or chipping. It’s also important that you trim and file your nails before applying the color – this ensures an even application across all of them.
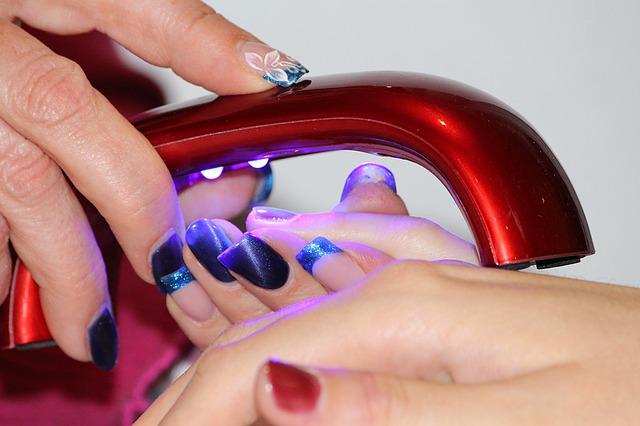
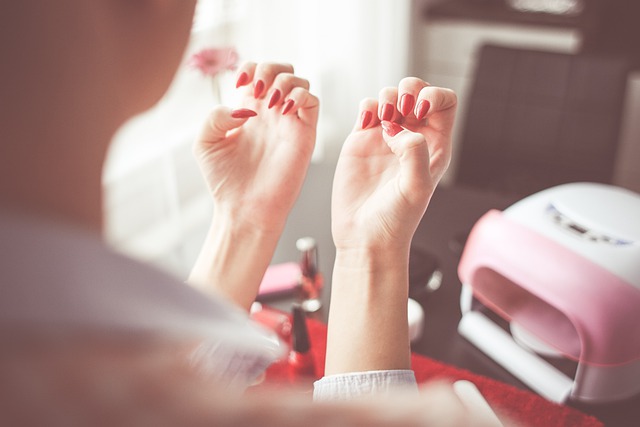
When ready, start by pushing back cuticles and then adding a base coat. This serves as a protective layer between skin & color, helping keep your manicure looking fresh longer. Next comes two coats of nail polish itself followed by a topcoat to seal everything together. You should allow each layer plenty of time to dry completely while keeping your strokes light & steady – don’t overwork each area as this can cause bubbling or smudge later on.
All that’s left is some final touches like cleaning up any excess around the edges using cotton swabs dipped in remover, plus adding shimmery accents if desired. And just like that, you’re done! With these steps in mind, you’ll soon master the art of creating beautiful manicures for yourself at home without breaking a sweat!
Removing Nail Polish: The Right Way
When it comes to removing nail polish, there are some important do’s and don’ts to keep in mind. It can be tough to know the right way to go about taking off your manicure without damaging your nails. Here, we’ll look at the proper steps for removing nail polish without compromising your nails’ health.
The first thing you should do is gather all of the necessary supplies: a cotton pad or ball, non-acetone remover, and cuticle oil. With these materials ready, start by dipping one cotton pad into the remover and press it against each fingernail for a few seconds before wiping it away. This will help break down any stubborn lacquer that may not come up with just light swiping motions.
Afterward, finish up by applying cuticle oil on each finger as well as rubbing moisturizer onto your hands – this helps restore moisture lost during the removal process. Follow these simple steps and you’ll have perfectly polished fingers (or toes!) with minimal damage done!
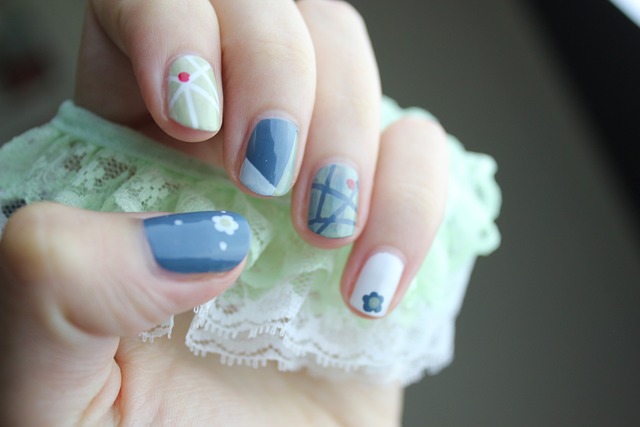
Nail Polish Trends To Try
When it comes to updating your look, one of the easiest and most effective ways is to experiment with nail polish trends. Whether you’re looking for something subtle or want to try out a bolder style, there are plenty of options available. Here we will discuss some trendy ideas so that you can get perfectly polished nails in no time!
For starters, glittery polishes have been popular for quite some time now and show no signs of slowing down. The best part about them is that they can be as subtle or as bold as you like – from just a little sparkle to full-on glitz. You could also opt for an ombre effect by mixing different shades together on each nail.
Alternatively, if you’re feeling more daring why not go for a matte finish? Not only does this create a unique texture but it also has the added bonus of being longer lasting so your nails stay looking perfect all day long. If you really want to stand out then metallic colors are definitely worth considering too; these shimmering hues provide lots of glamour without having to do anything else!
No matter what kind of look you’re going for, experimenting with new styles when it comes to applying nail polish is always fun – plus it allows you to switch up your appearance whenever the mood takes you! Just remember to follow our advice above and use high-quality products and tools so that your manicure looks its very best every time.
Nail Polish Don’Ts To Avoid
Now that you know the best trends to try, it’s important also to learn what not to do when applying nail polish. To ensure a perfectly polished look, there are some key don’ts to avoid. First and foremost is never shaking your nail polish bottle in order to mix up the color. This will cause bubbles which can ruin your manicure! Additionally, make sure that you always use a base coat before applying any colored polish. Not only does this help extend the life of your manicure but it prevents staining on natural nails. Lastly, be careful when removing nail polish as well; using acetone-free removers helps keep nails looking healthy and strong.
It’s essential to practice proper technique when painting nails for optimal results. Always start with clean dry nails and remove any old polish residue before beginning. When you’re finished painting each finger or toe, make sure you go over them with a top coat for added shine and protection against chipping. Additionally, wait at least 2 minutes between coats for proper drying time – rushing can result in bald spots or smudges on your final product!
These simple tips will have you sporting a perfect mani every time! Remember that patience is key – take care when applying polish, let layers fully dry before continuing and finish off with a clear topcoat sealant for lasting results. With just these few steps taken into account, you’ll master professional-looking manicures right from home!
Nail Care Maintenance
Taking care of your nails is an important part of having perfectly polished hands. Nail maintenance involves multiple steps, and it’s essential to follow them all if you want long-lasting results. To ensure that your nails look their best, here are the do’s and don’ts of nail care maintenance.
First off, it’s important to use cuticle oil or cream as often as needed. This will help keep the skin around your nails soft and hydrated. Additionally, make sure to have professional manicures regularly—they can be expensive but are worth it for keeping your nails healthy in the long run. Finally, remember to always use a base coat before applying polish! Not protecting your natural nails with a layer of base coat could leave them dry and damaged over time.
At home, practice good habits like removing nail polish every few days and replacing chipped polish immediately. Doing this keeps the surface clean so that new polishes will last longer without getting dull too quickly. Also, make sure not to skip using topcoats; this will add extra shine while also protecting against chips and scratches that occur throughout everyday life.
By following these easy tips on how to maintain healthy-looking nails, you’ll be able to keep up appearances until your next mani/pedi session!
Conclusion
Nail care is an important part of any beauty routine. Taking the time to properly prepare your nails and apply nail polish can help you achieve perfectly polished results every time. It’s also important to know which trends are in fashion, as well as which techniques should be avoided for a professional-looking finish. With proper preparation and following the do’s and don’ts discussed here, achieving perfect nails has never been easier.
It’s essential that you make sure to take good care of your nails by regularly moisturizing them with oil or lotion after removing old polish, using cuticle remover when needed, and applying a topcoat for extra protection from chips and cracks. By investing just a few minutes into caring for your nails each week, you will find yourself with healthy, beautiful hands all year round!
3 Popular Nail Polish Products To Consider
OPI Nail Lacquer

This long-lasting nail polish gives you beautiful color with a chip-resistant finish. The formula is designed to promote strong, healthy nails with a glossy shine that won’t fade away too quickly. Perfect for all special occasions, this easy-to-apply lacquer provides you with a gorgeous look that’s sure to get noticed. Whether you’re going for a subtle look or something more dramatic, the OPI Nail Lacquer is sure to give you just what you’re looking for. Give your nails an amazing, head-turning update with this professional-grade formula!
Essie Gel Couture Nail Polish

The Essie Gel Couture Nail Polish is designed to provide up to 14 days of intense color and shine. This long-lasting formula combines a base coat and color in one, allowing for easy application and removal. The high-tech gel finish gives your nails a salon-quality look that won’t fade or chip away. With its simple two-step process of applying the color and then sealing with the topcoat, you can get the perfect manicure without any mess or fuss. Whether you’re wearing it to a party, or wedding, or just to look put together for the day, Essie Gel Couture Nail Polish is an effortless way to add glamour and sophistication to your look in no time.
Sally Hansen Miracle Gel Nail Color

Sally Hansen Miracle Gel Nail Color is the perfect way to get salon-quality nails without spending time in a salon. The two-step system provides incredible color and shine that last up to 14 days with no chipping or fading. With over 70 vibrant shades to choose from, you can find the perfect color for any occasion. Its easy-to-apply formula is designed for at-home use, so you can get professional results with minimal effort. Get ready to show off your amazing mani!